 /pixelatedgears
Godot Extra Tip #2
Scene Transitions
Hello Godot users! This time I'm gonna talk a bit about scene transitions in Godot Engine.
You can take a look at the final result here.
Every game has to change from one screen to another at some point. When we make games we can have several screens for different purposes: main menu, options screen, the main game screen, credits, etc.
In Godot these screens are implemented using scenes. Scenes a collection of nodes that can be instanciated at any point and can be added to the main tree of nodes on our game, and these scenes are saved in a .scn file somewhere on the project directory.
When we want to switch to another scene we can make use of the change_scene method in the SceneTree class.
Something like this:
get_tree().change_scene("res://path/to/scene.scn")# using a preloaded PackedScene
var packed_scene = load("res://path/to/scene.scn")

		get_tree().change_scene_to(packed_scene)
How does it work? When we call change_scene() the engine frees the hierarchy of nodes of the current scene from the main node tree, and then it loads the new scene into the game tree. This change can take some time if the scene you're loading is big or contains a lot of nodes and can be very noticeable if we have a change of music or graphics between scenes.
What can we do? There are some things we can do to hide to the player the fact that the new scene is loading.
If we want to have the music play smoothly while the scene is switched we can use a singleton node as I explain on this tutorial.
But there's something else we can do that is easy and it adds a lot of personality to our game.
Transitions!
In Godot we can make very simple but effective screen transitions using the AnimationPlayer node. We can create an animation that functions as a transition between scenes. For example we can create a fadeIn-fadeOut transition using nothing but an AnimationPlayer and a TextureFrame node. Or even better, we can use a bunch of Sprite nodes and make the transition a little more fun by adding character sprites or game assets on the mix.
In this tutorial we're going to do a very simple fadeIn/fadeOut transition. On top of that we're going to add a feathered heart, because why not?
Here's the sprites we'll be using:
 A feathered heart
 A white square
Let's do it!
1. Create a new project. Change the screen size to 800x600.
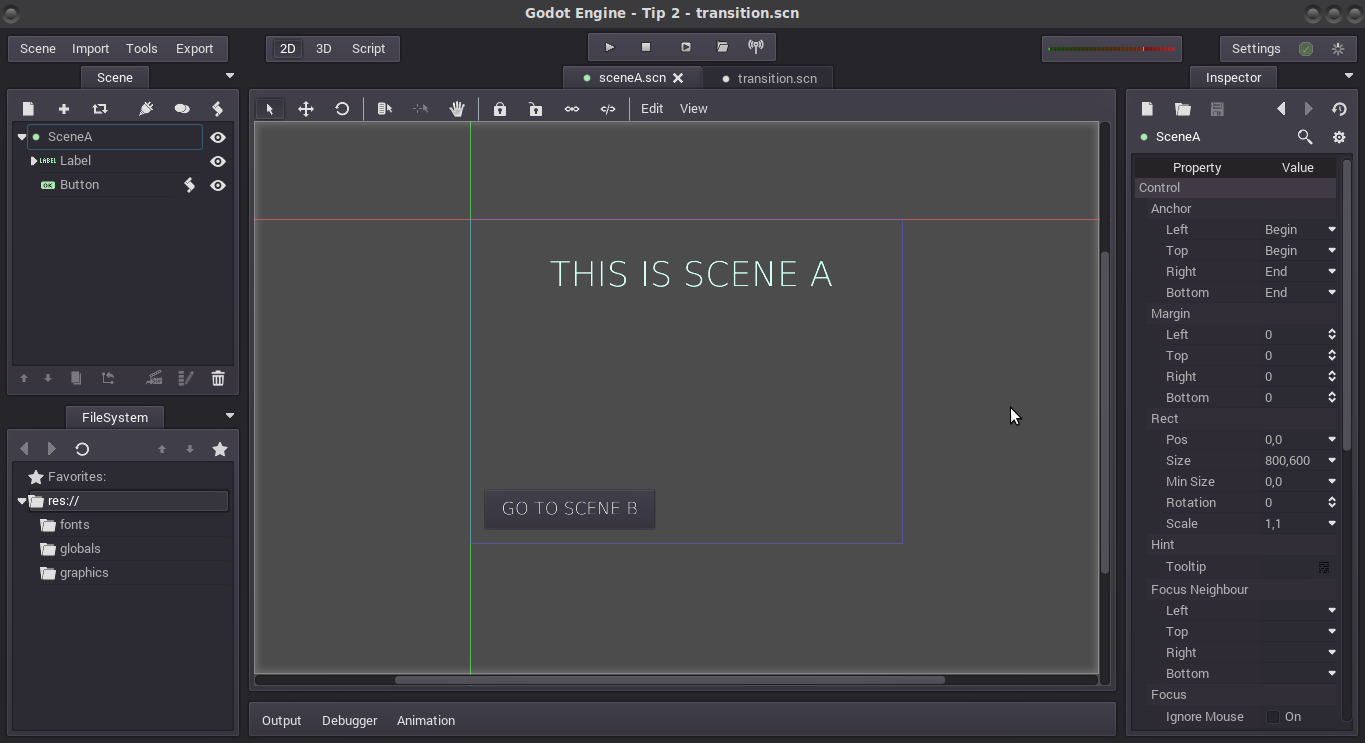
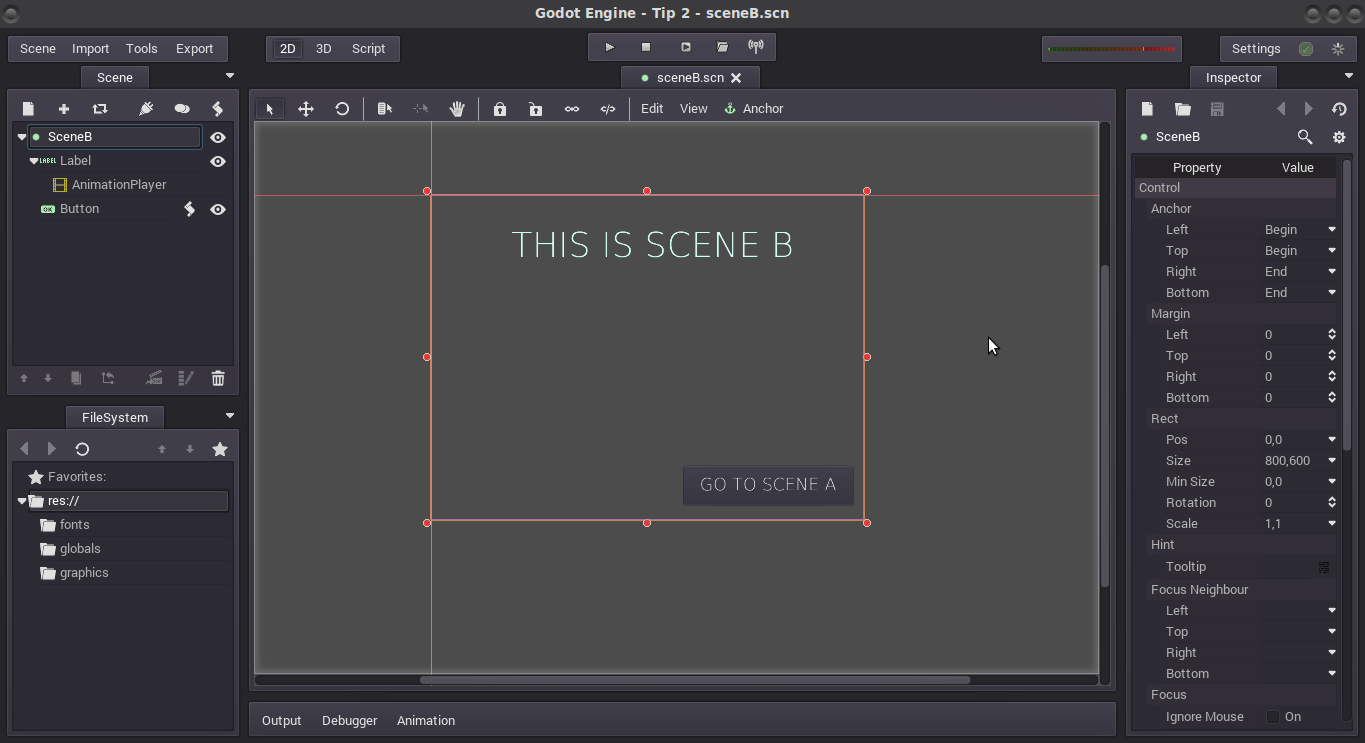
2. Now we're going to create two scenes (sceneA.scn & sceneB.scn). I've added some text to make them different and buttons to change from one to another.
3. Now we're going to creating the Transition scene. For this we'll use an Autoload to have only one instance of the Transition scene on our game at all times.
Create a new scene. Use a CanvasLayer as the root node for the scene. Change the CanvasLayer layer property to something bigger than 1 and save it as Transition.scn. The layer property tells Godot in which order the nodes should be rendered, in this case we want to draw the Transition on top of everything else.
4. Go the Project Settings and create the autoload for this scene. Make sure the singleton option is checked. This is new to the 2.0 version of Godot, if you don't use this version you can obtain the reference to the singleton using Globals or the old-school way get_node("/root/Transition"). On this version of Godot if you activate the singleton option you can use the name of the autoload directly from any script to get access to the autoloaded node, like this:
Transition.do_something()
# where "Transition" is the name you assign to the node in the Autoload options tab.
5. Now that we have our Transition singleton we're going back to the scenes A & B and add some behaviour to the buttons. Connect the pressed signal for the buttons to a function somewhere and add this code on each one:
func _on_Button_pressed(): Transition.fade_to("res://sceneB.scn")
# on scene B
func _on_Button_pressed(): Transition.fade_to("res://sceneA.scn")
What this will do is just call our fade_to function when we press the button. We just use "Transition" to get the reference to the singleton and then we call the function fade_to, and we pass the path to the scene we want to switch to.
Now, let's implement this function.
6. Go back to the Transition scene and add a script to the root node. In this script we're going to add the fade_to function.
extends CanvasLayer

# STORE THE SCENE PATH
var path = ""


# PUBLIC FUNCTION. CALLED WHENEVER YOU WANT TO CHANGE SCENE
func fade_to(scn_path):
	self.path = scn_path # store the scene path
	get_node("AnimationPlayer").play("fade") # play the transition animation

# PRIVATE FUNCTION. CALLED AT THE MIDDLE OF THE TRANSITION ANIMATION
func change_scene():
	if path != "":
		get_tree().change_scene(path)
The code it's pretty easy to understand. The fade_to function just stores the scene_path argument for later use, and then it plays the fade animation. At the middle of the animation the AnimationPlayer will call the change_scene() function, effectively switching the scene. After the scene is switched the player continues playing the rest of the animation.
8. All we have to do now is just create the fade animation and we're good to go!
For this we'll add a TextureFrame node that takes up the whole screen size. Just set it's texture to the white square texture I've listed above, set it's extend property to true and set it's anchor to Full Rect.
Check this video tutorial I've made about responsive UI if you don't know what I'm talking about.
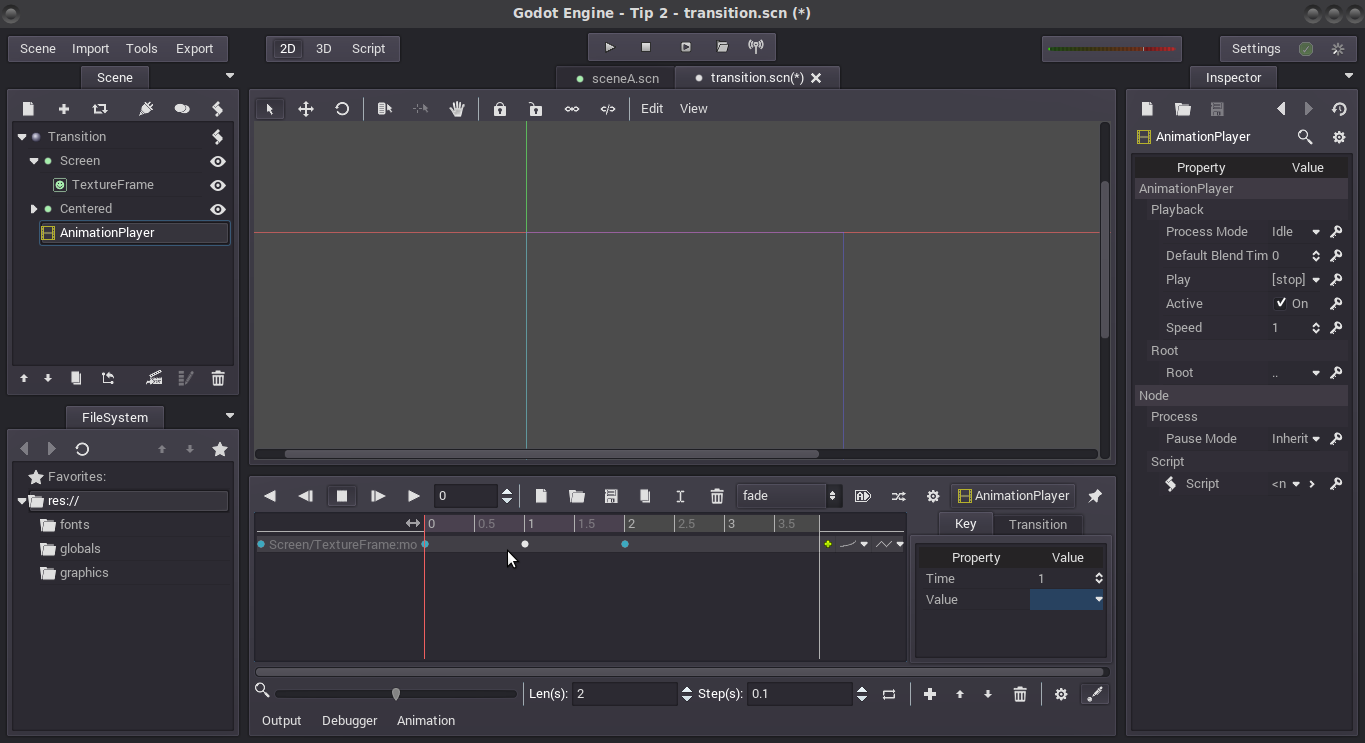
All the animation do is animate the modulate property, changing the alpha value to make the fade in & out effect.
Set the animation duration to 2 seconds. Add an animation key at 0, 1 and 2 second time with the alpha value at 0, 255 and 0 respectively.
You will end up with something like this:
9. Now the final part. We need to call the change_scene() function at the middle of the animation. We do this by adding a call function track to the animation. The function track works like the other tracks except instead of animating properties like color or position, it makes calls to a function of a certain node.
Add a new function track pressing on the big plus icon at the bottom of the animation panel. Click on Add Call Func Track. It will open a new window asking for a node where to make the calls to. Select the root node (the CanvasLayer node) and press OK.
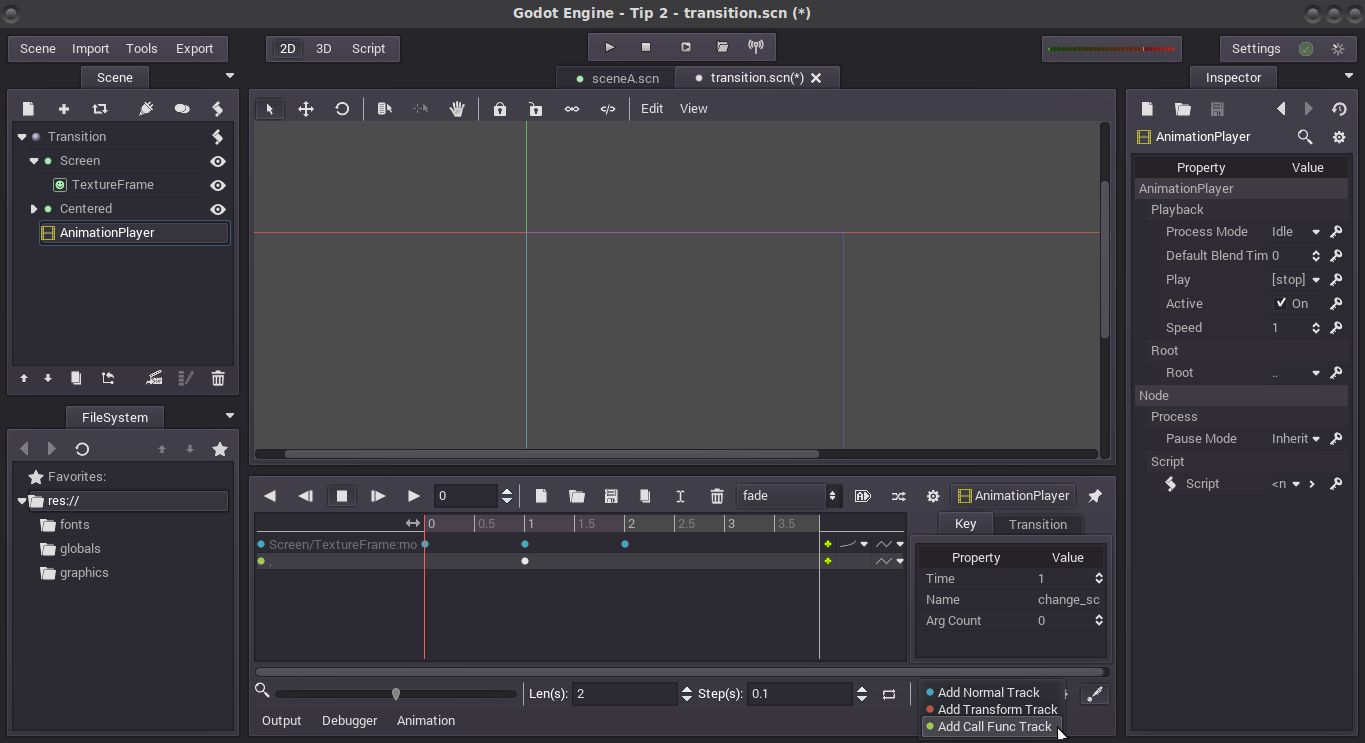
Now move the animation timeline to the 1 second mark and add a new animation key to the call function track. You can do this by pressing on the little green plus icon at the right end of the track. A new animation key will appear on the timeline.
Press CONTROL + LEFT CLICK on the animation key to open the key editor. In the editor change the
name property to "change_scene" (the name of the function we want to call).That's it! Now the function will be called at exactly the middle of the animation.
Final Result
Here's how the transition looks like: